Saturday, December 19, 2020

Creamy Quinoa Kheer


Hello everyone,

Quinoa payasam or kheer is the delicious and simple dessert made with milk and quinoa. 

I eat quinoa almost everyday for rasam rice and curd rice. Also, I use it in burrito as substitute to rice. It was my son's star birthday and I wanted to make some payasam/kheer to offer god. Why not prepare quinoa payasam rather than regular vermisili or rice payasam. Yes, I decided to make it and it was delicious.

We can pressure cook the quinoa in milk to speed up the process but I slow cooked on stove top to get creamy consistency. 

Serving size - 3-4  

Ingredients:

Quinoa - 1/2 cup

Whole Milk - 3.5 Cups

Jaggery - 3/4 to 1 cup

Cardamom powder - 1/4 tsp

Ghee - 2 tbsp

Cashews - 10

Raisins - 10

Pre-preparation:

1. Wash quinoa with water, drain and keep it aside to dry.

2. Grate or powder the jaggery.

3. In a small pan, melt ghee. Add cashews, raisins and fry till cashew turns golden brown. 

Method:

1. In a heavy bottomed vessel, melt ghee and roast the quinoa for few seconds. 

2. Add 3.5 cups of milk and boil the milk on a medium heat until the quinoa is cooked. It takes about 10 mins. 

3. Lower the heat further and keep stirring the milk. When you see the creamy layer, stir and mix it. 

4. Stir until the quinoa and milk reduces to half the quantity. This process takes around 30 mins. 

5. Add powdered jaggery, cardamom powder. Mix well and switch off the stove. 

5. Finally garnish with roasted cashews and raisins. Quinoa payasam is ready to serve. 


Note:

1. Do not burn the quinoa while roasting.

2. Put a ladle in the vessel so that milk do not overflow. 

3. Make sure to add jaggery at the end to void curdling. 

Saturday, November 21, 2020

Lauki Dal


Hello everyone,

Lauki dal is an Indian lentil curry which is made using bottle gourd and mix of dals. Adding bottle gourd to the dal makes the curry more nutritious and healthy. This is easy to make and it goes well with rice or rotis. 

The usual Lauki dal is prepared only with Chana dal. But, this recipe is prepared with toor dal, Chana dal and moong dal with equal quantities. 

I had tasted this when I was working in Chennai. I used to stay in company's guest house where the cook is a North Indian. He makes this dish with Chana dal. For some reason we never used to buy bottle gourd in India. After coming to US, I started making South Indian style kootu with this. I bought instant pot recently and its pretty easy to make this dal in it. 

The recipe below has both pressure cooker and IP method of preparation. 

Serving size: 4-5 people

Ingredients:

Lauki/Sorakkai/bottle gourd - 2 cups

Toor dal - 1/4 cup

Channa dal - 1/4 cup

Moong dal - 1/4 cup

Onion - 1 

Ginger garlic paste - 1 tsp

Ghee or oil - 1 tbsp

Cumin seeds - 1 tsp

Turmeric powder - 1/2 tsp

Chili powder - 1 tsp

Cumin powder - 1 tsp

Coriander powder - 1 tsp

Kasoori methi - 1 tsp

Water - 2 - 2 1/4 cup

Salt as per taste

Cilantro -  few finely chopped 

Preparation:

1. Peel the skin of the bottle gourd and chop into small cubes by removing seeds. 

2. Take all the three dals in a bowl and soak in water for half an hour.

3.Finely chop onions, crush the ginger garlic and keep it ready.

Method:

Pressure Cooker:

1. Heat the pressure cooker, melt ghee and add cumin seeds. Once the cumin seeds splutters, add onion, ginger garlic paste. Sauté until it turns golden brown and the raw smell goes. 

2. Add turmeric powder, chili powder, cumin powder, coriander powder and sauté for a minute.

3. Now add chopped bottle gourd and sauté for another minute. 

 4. Add soaked dals, water, kasoori methi and required salt. Pressure cook for 2-3 whistles. 

5. Once the pressure cooking is done, stir well and garnish with cilantro. 

Instant Pot:

1. Set the IP in Sauté mode for 8mins. When it is hot, add ghee and cumin seeds. Once the cumin seeds splutters, add onion, ginger garlic paste. Sauté until it turns golden brown and the raw smell goes. 

2. Add turmeric powder, chili powder, cumin powder, coriander powder and sauté for a minute.

3. Now add chopped bottle gourd and sauté for another minute.  

4. Add soaked dals, water, kasoori methi and required salt. 

5. Close the lid and make sure the vent in sealing position. Set to pressure cook mode for 8 mins at high pressure. 

6.. Once the pressure cooking is done, leave it for 10-15 mins and allow the pressure to release by itself.

7. Open the lid, give it a good stir and garnish with cilantro. 

Serve hot with steamed rice or Jeera rice or rotis. 


Notes:

1. You can add one slit green chili if you like it more spicy. 


Monday, October 26, 2020

Masal Puri - Coimbatore Style


Hello everyone,

Masala puri is a popular street food in India. The taste and way of making masala puri differs from place to place. I am from Coimbatore, I have tasted masala puri in quiet a lot of places(Coimbatore ,Bangalore, Hyd, Chennai, Jaipur, Goa and even US) but for me nothing tasted better than Coimbatore version of it especially Sasi kadai in S.B Colony.

Two of my close relatives used to live in S.B Colony so whenever we go there we stop by ARC Sasi Pani Puri( Sasi Kadai) to have masala puri and bhel puri. They serve amazing chaats. I missed this after moving to Bangalore. I missed it so much that I learned to make this dish 8 yrs ago from a blog. I have been making the same way. It tastes great, I would to share the receipe with you and hope you like it as well. 

Usually masala puri is made by breaking the puris and pour the masala on top of it. In Coimbatore, they place the puri on the plate by making small hole and add masala on it. The recipe to make for 3-4 servings. 

Ingredients:

Puri - 20-25

Onion - 1 finely chopped

Tomato - 1 big finely chopped

Cilantro - 1/2 cup finely chopped

Grated carrot - 3/4 cup

Sev - 1 cup

Chaat masala - 2 tbsp

For Masala Gravy

Dried Green Peas - 1 cup

Onion - 1 Cup chopped

Ginger - 1/2 inch

Garlic - 2 pods small

Turmeric powder - 1/2 tsp

Chili powder - 1/2 tsp

Garam masala - 1 tsp

Coriander powder - 1 tsp

Green chili - 1or 2 (according to spice level)

Cilantro - 1/4 cup

Salt as required

Method:

1. Soak peas overnight or for nearly 8 hrs and pressure cook them for 4 whistles by adding water and some salt. Keep it aside.

2. Grind all the ingredients under 'For Masala Gravy' section with half a cup of boiled peas to a fine paste. Reserve rest of the boiled peas.

3. In a heavy bottomed vessel, add grinded paste and bring it to boil. Cook until the raw smell goes. Add little water to maintain the consistency. The gravy shouldn't be too thick. Masala is ready.

4. Now place 5-6 puris on a plate and make a hole on top of the puris. 

5. Add 1 tsp of reserved peas into each puris and pour the masala paste on top of the puris. Finally garnish with  chopped onion, tomatoes, carrot, cilantro and sev. Sprinkle some chaat masala on top of it. 

Enjoy Coimbatore's masala puri.


Tuesday, October 6, 2020

Butter Muruku


Hello everyone,

Butter Murukku is called as Benne muruku(Kanada) or Vennai muruku(Tamil). This crispy muruku is made with rice flour, gram flour and of course butter :). It is usually made during the festivals like diwali and janmashtami. 

I tried to make butter muruku soon after we shifted to US. To my surprise it turned out very crispy and tasty. My husband wanted me to make again to share with his office friends. Since then I follow the same recipe to make it.  

Ingredients:

Rice flour - 3 cups

Besan/Gram flour - 1/2 cup

Roasted gram flour - 1 tbsp

Cumin seeds - 1 tsp

Hing  - 1/4 tsp

Salt as needed

Butter(room temperature) - 2 tbsp

Water as needed

Oil for frying

Method:

1. To make roasted gram flour Take 2-3 tbsp roasted gram in a mixie and grind it to fine powder. Roasted gram flour is ready. 

2. In a mixing bowl, take all rice flour, gram flour, roasted gram flour, cumin seeds, hing, butter and salt. Butter should evenly mix with the flour.

3. Add water little by little and knead the flour to a smooth and tight dough. 

4. Use the star shaped plate to make butter muruku. Grease the muruku maker with oil. 

5. Fill it with prepared dough and tighten the lid.

5. Heat oil on a medium flame to maximum temperature. Squeeze it directly in the hot oil. Flip the muruku to cook on both the sides. Cook until golden brown and drain it in tissue paper. 

6. Allow it to cool down and store it in an air tight container. 


Notes:

1. Do not squeeze more and over mess. Muruku will not be cooked properly. 

2. Make sure the dough is not too soft otherwise muruku will absorb more oil.


Wednesday, September 23, 2020

Ivy gourd cashew stir fry


Hello everyone,

Ivy gourd cashew stir fry is prepared with tender Ivy gourd and tender cashews. Ivy gourd is referred as Kovakkai in tamil and Thondekai in Kannada. This is a very special dish in dakshina kannada region. 

I was introduced to this by my friend from Dakshina Kannada(Puttur). I tasted this at her sister's wedding. It was so rich and tasty. Never tasted Ivy gourd stir fry with cashews till then. Then one day she gave me the recipe and the story behind it. Dakshina Kannada region is rich in cashew cultivation. Cashew nut trading season is from March to May. The fully grown cashews are sold to the market. The leftover cashews that are not of high quality are used by the people in that region to make this Ivy gourd palya at home. Ideally we should use tender cashews to prepare this, as we don't get tender cashews here I soaked the raw cashews in water and cooked along with ivy gourd. This is a mandatory dish in marriages or any functions if it is during April-June. Here is the recipe. 

Ingredients:

Tindora - 3 cups cut lengthwise

Cashew - 1/4 cup

water - 1/2 cup 

Salt as per taste

To Grind:

Grated coconut - 1/4 cup

Green chili - 1 or 2

To Temper:

Mustard seeds - 1/2 tsp

Urad dal - 1/4 tsp

Chana dal - 1/4 tsp

Byadige chili - 1 

Curry leaves

Hing a pinch

Method:

1. Soak cashew in warm water for half an hour. Drain the water and keep it aside.

2. Grind coconut and green chili coarsely without water. Keep it ready.

3. Heat oil in a kadai or large pan, add ingredients under 'To temper' section. Fry until dal turns golden brown. 

4. Add tindora, soaked cashews and saute until it is combined well.

5. Now add water, salt as required. Cover and cook for about 12-15mins. Tindora will be cooked and water gets dried up. 

6. Finally, add coconut green chili and mix well. Turn off the heat.

Note: 

1. Avoid green chili if you want it to be less spicy.

Tuesday, September 8, 2020

Thavala Adai


Hello everyone,

Thavala adai is a traditional recipe from Tanjore. It is prepared with arisi kurunai(broken rice) and lentils. 

I never tasted this until I got married. My MIL makes it and I learnt this recipe from her. Thavala means big pot in Tamil. Adai is roasted in thavala instead of dosa tawa. My MIL used to make this in vengala thavalai later she started doing using dosa tawa as she used to get burns in hand while flipping the adai.  

Thavala adai can be made as a tiffin instead of regular dosa, idli,upma etc. This is rich is in protein. It is crispy outside and soft inside. This is little time consuming but it tastes great. 

This can be given to kids for lunch box and they would love it. Give it a try and here is the recipe. 


Ingredients:

Raw rice - 1 cup

Mustard seeds - 1 tsp

Hing - a generous pinch

Grated coconut - 1/4 cup

Coconut oil - 1 tbsp for preparing mix + 2 tbsp for roasting

Salt as needed

To Soak and Grind:

Toor dal - 1/4 cup

Chana dal - 1/4 cup

Mung dal - 1/4 cup

Urad dal - 1.5 tbsp

Red chili - 1

Green chili - 1

Ginger - 1/2 inch

Cumin seeds - 1 tsp

Pepper corns - 1/2 tsp

Curry leaves - 7-8 nos

Method:

  1. Grind rice coarsely like sooji and keep it aside.
  2. In a bowl soak toor dal, chana dal, moong dal & urad dal in enough water for 2 hrs. 
  3. Transfer the soaked dals into a blender and add red chili, green chili, ginger, cumin seeds, pepper,curry leaves to it. Grind it coarsely without adding water. Keep this aside.
  4. Heat 1tbsp coconut oil in a large pan, add mustard seeds. Once it sizzles, add 2 cups of water, salt, coconut and hing. Allow the water to boil.
  5. When the water starts to boil, add coarsely ground rice. Mix well with a laddle without any lumps. Once it is cooked, add the dal mix. Combine well to make it like upma. Allow it to cool down.  
  6. Apply oil in dosa tawa and heat it. Take lemon size ball and make it like thin cutlet and roast in dosa tawa. Apply oil and gently flip to cook the other side. Add 3-4 adai in one batch. 
  7. Adai will be crispy when both the sides turn golden brown. Remove them from the tawa and repeat the same with rest of the rice dal mix. 
  8. Thavala adai is ready to serve with any kind of chutney. 


Wednesday, August 12, 2020

Chana Masala/Chole


Hello everyone,

Chana masala/Chole is a popular indian dish which is made by cooking chickpeas in onion, tomato gravy along with spices. 
I make chana masala more often as it is rich is protein. I usually make it with basic spices but off late I am using homemade masala powder to prepare this. It goes well with poori, jeera rice, bhatura.
 
Ingredients:
Chickpeas or Garbanzo bean - 1 cup
Water - 2 1/2 cup to boil
Ginger garlic paste - 1 tsp
Onion - 1 cup finely chopped
Green chili - 1 slit
Tomatoes - 2 large
Ghee/oil - 2 tbsp
Cumin seeds - 1 tsp
Bay leaf - 1
Cinnamon - 1/2 inch
Cilantro -  few chopped
Salt to taste

Method:

1. Soak chickpeas in water overnight. Pressure cook with little salt and 21/2 cup water for about 5-6 whistles on a medium heat.
2. Chop tomatoes and blend it to puree without adding water. Keep it aside.
3. Melt ghee in a large pan, add cumin seeds, bay leaf, cinnamon and then add onion,green chili, ginger garlic paste. Saute until onion turns golden brown.
4. Add chana masala powder and sprinkle some salt for the onion. Cook for couple of minutes. 
5. Now add tomato puree and saute until oil separates from masala.
6. Add boiled chickpeas and adjust the consistency.
7. Cover and cook for about 10mins in low flame.
8. Garnish with cilantro and enjoy chana masala with roti, poori or jeera rice.

Note:
1. Mash few chickpeas if the gravy is watery. Mashing or grinding the chickpeas makes the gravy thick.
2. Adjust the chana masala powder quantity depending on the spice level.


Tuesday, August 11, 2020

Poha Ladoo

Hello everyone,

Poha ladoo or Aval ladoo is an easy to make traditional sweet which is made by grinding poha/aval with jaggery, some cardamom, dry coconut and rolled into balls. 

This is usually made for gokulastami/krishnar jayanthi as Aval is Krishna's favorite. I do not want to prepare deep fried bakshanams with my one year old kiddo. So, I made aval ladoo for this year krishnar jayanthi. Aval ladoo is a healthy snack for kids. My older one likes it a lot. Here is the recipe. 

Ingredients:

Poha/Aval/Beaten Rice - 1 Cup

Jaggery - 3/4 Cup

Cardamom - 5-6

Desiccated dry coconut - 1/4 Cup

Ghee - 2 tbsp

Cashews - few broken

Method:

1. Dry roast Aval/Poha until it is crunchy. Allow it to cool down. 

2. Grate the jaggery. 

3. Transfer roasted poha and jaggery to a mixer. Add cardamom, desiccated dry coconut and grind it to a fine powder.

4.Heat ghee in a pan, add cashews and fry until it turns golden brown. Turn off the stove. 

5. Add the ghee and cashews to the grinded Aval/Poha powder. Knead well and make gooseberry sized balls with palm. 

6. Store ladoo in a air tight container. 

Notes:

1. Adding coconut is optional. 

2. If using fresh grated coconut, dry roast it without burning before grinding. 

3. Poha is a dry ingredient so use required quantity ghee to combine it. Add extra ghee if it breaks while making balls.

Tuesday, July 28, 2020

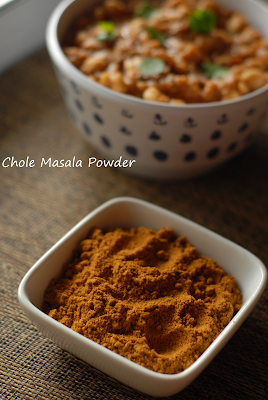
Chole Masala


Hello everyone,

Chole tastes great with chana masala powder. Chana masala is available in  all the indian grocery store but it enhances the taste when we use freshly ground powder.  

I used to make chole with just regular spices(chili powder, turmeric powder, cumin powder and coriander powder). These days I make it with homemade masala powder. 
Ingredients:
Dried red chili - 7 (I used byadige chili)
Coriander seeds  - 3 tbsp
Cumin seeds - 2 tbsp
Cardamom - 6
Black pepper corns - 2 tsp 
Cloves - 5-6
Turmeric powder - 1/2 tsp
Amchur powder - 3 tbsp
Hing - 1/2 tsp

Method:
1. In a pan, add all the ingredients except turmeric powder, amchur powder and hing. Dry roast on a low flame until it turns aromatic and the red chili is crunchy.
2. Turn off the heat and transfer it to a blender or mixer. Allow it to cool down.
3. Add turmeric powder, amchur powder and hing. Grind it to a fine powder. 
4. Store it in an air tight container and use it while preparing chana masala.

Friday, July 17, 2020

Mambazha Pulissery


Hello everyone,

Mambazha pulissery or mambazha mor kuzhambu is a delicious mango curry made with mangoes, yogurt, coconut and spices. This authentic kerala dish has sweet and sour taste. It is served as part of onam sadhya.


I tasted mambazha pulissery for the first time in thalathoor heritage resort, Kazargod. Resort's owner aunty prepared this authentic curry with whole mangoes for our lunch. It was amazing. We don’t get small mangoes here in US so I chopped the mango to prepare this curry. Here you go, below is the recipe.


Ingredients:

Ripe Mango - 1 big or 2 small
Water -  1/2 cup
Curd or Yogurt -  2 1/2 cup
Turmeric Powder -
Jaggery - 1 or 2 tsp as per mango taste(optional)
Salt to taste

To grind:
Grated Coconut - 1/2 cup
Green chili - 1
Cumin seeds - 1 tsp

To Temper:
Mustard seeds - 1 tsp
Curry leaves - few
Red chili - 1 split into 2 halves
Coconut oil - 1 tbsp

Method:
1. Peel the skin of mango and chop it into rough pieces. 
2. In a pan, add chopped mangoes, 1/2 cup water, pinch of salt, jaggery(optional). Cook them in medium heat for 3-4 mins. Switch off the heat. Allow the mangoes to cool down.
4.Meanwhile, grind the ingredients under 'To grind' section with little water to smooth paste.
5. Take curd in a vessel or bowl, add ground coconut paste, salt, turmeric powder. Mix well. 
6. Add the curd coconut mix to the mango. Stir well so that curd is mixed well with mango.
7. Turn on the stove, cook the curd mango mix for 2 mins in low flame. Switch off the heat.
8. Heat coconut oil in small skillet, add mustard seeds, red chili and curry leaves. Once it splutters add it to the cooked curry.
9. Serve with hot steamed rice and any choice of kaara kari.


Notes:
1. Always use ripe mango. 
2. Add jaggery if the mango is sour. 
3. Cook the curry in low heat to avoid curdling.
4.I always use less spice. Add an extra chili as per taste.


Thursday, July 9, 2020

Mango Rice


Hello everyone,

Mango rice or manga saadham is very delicious rice which is similar to lemon rice with tangy taste. My mom used to make this but I was not fond of it. My MIL makes when its mango season. I like to take it for lunchbox.


This is the season for mangoes. My husband went to Indian store and bought raw mango. Its been long time since I made rice with mango. Hence, I decided to make it for lunch. Here is the recipe.


Ingredients:

Grated Raw Mango - 1 cup

Grated coconut - 1/4 cup

Turmeric powder - 1/4 tsp

Cooked Rice - 2 cups

Salt as per taste

Coriander leaves - few for garnishing


To Temper:

Oil - 1tbsp

Mustard seeds - 1tsp

Urad dal - 1 1/2 tsp

Chana dal - 2 tsp

Hing a pinch

Green chili -  1 slit

Curry leaves - few

Peanuts - 1/4 cup


Method

  1. Dry roast the peanuts and keep it aside. Make sure not to burn the peanuts.
  2. Heat oil in a kadai, add the ingredients under 'To Temper' section except curry leaves, green chili and roasted peanuts.
  3. When the mustard seeds splutters and the dal turns brown, add curry leaves, green chili and peanuts.
  4. Add turmeric powder, grated mango. Mix well.
  5. Sauté for 2-3 mins or until the grated mango shrinks.
  6. Take cooked rice in a large bowl, add the mango mix, salt, grated coconut and coriander leaves. Mix well without breaking the rice.
  7.  Mango rice is ready to serve with appalam or any vadaam.


Notes:

  1. Rice has to be cooked in such a way that it is not sticky and the grain are separate.
  2. Rice has to be cooled.
  3. I always use less spice so that my son can eat. If you want the rice to be more spicy, add 1-2 red or greed chili.
  4. Skip step 1 if you have roasted peanuts.

Sunday, June 21, 2020

Broccoli Parupu Usili


Hello everyone,


Parupu Usili is a very popular TamBrahm dish. Usually this is prepared with beans, cluster beans, cabbage and plantain flower. I came across broccoli version of this dish in instagram. Tried making the same very next day. It was very tasty. Broccoli is rich in vitamins, fiber and potassium. I love broccoli and use it at least twice in a week.

Parupu usili goes well as a side with mor kuzhambu or vatha kuzhambu.


Servings: 3-4

Ingredients:

Broccoli - 2 crowns

Water - 3 cups

Toor dal - 1/4 cup

Chana dal - 1/4 cup

Red chili - 2

Jeera - 1/2 tsp

Salt as per taste

Hing a pinch


For Seasoning:

Oil - 1 tbsp

Mustard seeds - 1 tsp

Uad dal - 1tsp

Curry leaves - 4-5nos


Method:

  1. Pluck the broccoli florets into small pieces. Boil the water in a vessel with salt. Cook the florets for 5-6 mins until stem turns soft.
  2. Strain the water in a colander and keep the florets aside.
  3.  Wash and soak the dals in water for about two hours. Drain the water and transfer it to a mixer.
  4. Add red chili, jeera, hing, salt and grind it coarsely without adding water.
  5. Steam the idli plate or steaming basket with oil and steam the ground dal mix for 6-7 mins. Crumble it and keep it aside.
  6. Heat oil in a kadai, temper with mustard seeds, urad dal and curry leaves. Add crumbled dal and fry for a minute. Then add cooked broccoli florets and mix well.
  7. Stir it for 2 mins and switch off the heat.


Notes:

Do not over cook broccoli otherwise color if it will be changed. It has to be nice green color.


Wednesday, June 3, 2020

Rava Semiya Paniyaram


Hello everyone,


Rava Semiya paniyaram is an easy snack or tiffin which is made by adding onion, carrots and other spices to the rava semiya batter.

We usually make Paniyaram or paddu with idli/dosa batter. If we are out of dosa batter, we have the option of making rava semiya paniyaram. This instant paniyaram is easy to make for kids lunch box.


Usually only rava is used to make instant paniyaram but adding semiya will give a nice taste and texture.


My MIL read this recipe in some magazine. She said she tried without any spice or masala and it came out well. 

My son likes carrot in everything. I tried adding onion and carrots and it turned out really yumm :)


Ingredients:

For batter:

Rava - 1 cup

Semiya - 1 cup

Curd/Yogurt - 1 cup

Water - 1 cup+ 1 cup

Salt to taste

Coriander leaves

Oil as needed for roasting


For the masala:

Oil - 2tbsp

Mustard seeds- 1tsp

Cumin seeds/Jeera - 1/2 tsp

Urad dal - 1tsp

Chana dal - 1tsp

Green chili - 1 or 2 finely chopped as per spice level

Ginger - 1tsp grated or crushed

Curry leaves -few chopped

Hing - a pinch

Onion - 1 cup finely chopped

Carrot - 1 cup grated

Salt - a pinch


Method:

  1. Dry roast rava and semiya for about 1-2 mins or until it is hot.
  2. In a large bowl, add rava, semiya, curd and  1 cup water. Mix well and let it rest for 25mins.
  3. In the mean time, prepare the masala for the paniyaram. Heat oil in a pan, add mustard seeds.
  4. When it splutters, add cumin seeds, urad dal, chana dal, green chili, ginger, curry leaves. Fry until dal turns golden brown.
  5. Add onion, sauté until it is translucent. To the onion, add carrot and sprinkle some salt. Sauté for a minute and switch off the heat.

  6. Transfer the prepared onion carrot mix to the paniyaram batter. Add some salt, coriander leaves and mix well.
  7. Further add 1 cup water to adjust the consistency.
  8. Heat paniyaram/appe pan, add few drops of oil in the holes.
  9. Fill each hole with prepared rava semiya paniyaram batter. Simmer and cook until the base turns golden.
  10. Flip it over and cook on the other side. Simmer again and cook until golden brown.
  11. Rava Semiya Paniyaram is ready to serve with any preferred chutney


Saturday, May 30, 2020

Matar Paneer

Hello everyone,


Matar Paneer is one of the popular paneer dishes where paneer and peas are cooked in creamy onion, tomato gravy. Adding Kus kus and cashew makes the gravy more creamier.

I often make matar paneer as it is easy to cook and it goes well with rice and roti.


Ingredients:

Paneer cubes - 1 1/2 cup

Fresh or frozen Peas - 1/4 cup

Turmeric powder - 1/4 tsp

Chili powder - 1/4-1/2 tsp

Coriander powder - 1/4 tsp

Cumin powder - 1/4 tsp

Cinnamon - 1/2 inch

Bay leaf - 1

Yogurt - 1-2 tbsp

Coriander leaves -  few for garnishing

Kasoori methi - 1/2 tsp

Garam masala - 1/4 tsp

Oil/Ghee - 1tbsp

Salt to taste


To Sauté and Grind - Onion tomato paste

Onion - 2 nos chopped(I used 1 big onion)

Tomatoes - 2 nos chopped

Ginger - 1/2 inch

Garlic - 1(big pod)

Kus Kus - 1tsp

Cashew - 6-7


Method:

  1. Heat oil/ghee in a pan, add onions, ginger, garlic and sauté until onion turns light brown.
  2. Add tomato and sauté until it turns mushy.
  3. Finally, add kus kus, cashews and cook for a minute. It should give a nice aroma when all of them are nicely cooked.  Switch off the stove. Allow it to cool down and grind it to a fine paste.
  4. Heat oil/ghee in a another large pan, add cinnamon stick, bay leaf and fry for few secs until you get nice aroma.
  5. Simmer the flame, add chili powder. Sauté until you see nice red color.(Do not sauté for more time. Chili powder will turn brown).
  6. Now add the ground paste to the pan and mix well.
  7. Add turmeric powder, coriander powder, cumin powder to the ground paste. Mix well and cook for 2-3 mins.
  8. Add curd, stir continuously until it blends with the onion tomato paste. Add water to adjust the consistency.
  9. Add add paneer cubes , peas and cook for about 6-7 mins in a medium heat.
  10. Finally add crushed kasoori methi, then sprinkle garam masala. Switch off the heat.
  11. Garnish with coriander leaves and serve hot with chapati, roti, phulkas, naan or jeera rice.


Wednesday, May 20, 2020

Podalangai poricha kuzhambu


Hello everyone,


Podalangai poricha kuzhambu, podalangai/snake gourd is cooked with moong dal, coconut and other spices. This version of poricha kuzhambu is Tanjore style poricha kuzhambu. It is a healthy dish as it is a combination of vegetable(fiber) and dal(protein).


My MIL cooks few Tanjore style dishes as her mom is from Tanjore. She used to cook podalangai poricha kuzhambu and everyone in the family likes it. I learnt this recipe from her and I often make this. It tastes great with hot rice.


Ingredients:

Podalangai/Snake gourd - 1 long

Moong dal - 1/2 cup

Turmeric powder - 1/2 tsp

Water - 3 Cups

Jaggery - 1tsp

Salt - as per taste


To roast and grind:

Urad dal - 1 tbsp

Cumin seeds/Jeera - 1 tsp

Coriander seeds/Dhania - 1 tsp

Black pepper corns - 1tsp

Dried Red Chili - 2

Fresh grated coconut - 1/4 cup

Curry leaves - 4-5

Coconut oil/Ghee - 2 tsp


To temper:

Coconut oil/Ghee - 2tsp

Mustard seeds - 1tsp

Urad dal - 1tsp

Curry leaves - 2


Method:

  1. Wash snake gourd and chop it to 1/2 inch pieces.
  2. Cook the moong dal in a heavy bottomed vessel with water, turmeric powder, jaggery and little salt for dal.
  3. Once the dal is half cooked add chopped snake gourd, salt and cook this on medium heat for 7-10 mins.
  4. Meanwhile, heat coconut oil/ghee in a pan and roast all the ingredients under "To roast and grind" except coconut. Roast it until dal turns golden brown.
  5. Now add coconut. Switch off the stove. Let it cool down and then grind it to smooth paste.  Keep it aside.
  6. Once the snake gourd and dal is cooked, add the ground paste and mix well.
  7. Allow it to boil for about 5 mins in low heat. Stir in between so that it doesn’t stick to the bottom.
  8. Heat oil/ghee in a small pan, add mustard seeds. Once it splutters, add urad dal, curry leaves and hing. Add this to the boiling kuzhambu and switch off the heat.
  9. Serve hot with rice.


Note:

  1. You can cook the dal in pressure cooker for 2-3 whistles. Cook gourd in a vessel and then dal can be added to boiling gourd. This will minimize the cooking time.
  2. Adding jaggery to this Kuzhambu is optional.

Friday, May 15, 2020

Chettinad Potato Fry


Hello everyone,


Chettinad potato fry is a prepared with freshly ground spices which gives nice flavor to the potato fry than the regular one. Chettinad cuisine is from Chettinad region of Tamil Nadu. It uses variety of spices and their dishes are made with freshly ground masalas.


I personally don’t like the flavor of garlic in vegetables. I usually make the regular potato fry with just salt, turmeric powder and chili powder or the podimas. When I was out for my work on a Saturday, I asked SV to cook. He googled and found recipe for chettinad potato fry. He made this and it was delicious with nice flavor. I then did my research and found recipe for this. Tried on another day by myself and it came out well. Hence, sharing the recipe.


Ingredients

Potatoes - 3

Onion - 1 Cup(thinly sliced)

Garlic - 3 small pods(peeled and finely chopped)

Mustard seeds - 1/2 tsp

Curry leaves - 6-7

Hing - A pinch

Oil - 2-3 tbsp.


To marinate:

Turmeric powder - 1/4 tsp

Chili powder - 1/2 tsp

Salt as per taste

Oil - 1 tsp


To roast and grind:

Red chili - 2-3(As per spice level)

Channa dal - 1tsp

Urad dal - 1/2 tsp

Coriander seeds - 1/2 tsp

Pepper corns - 1/2 tsp

Fennel seeds - 1/4 tsp


Method:

  1. Boil full potatoes. Peel the skin and cut into cubes.
  2. Transfer the potatoes to a bowl, add all the ingredients in 'To marinate' section to the potatoes. Mix well so that the spices is well coated. Keep it aside.
  3. Heat a pan and dry roast all the ingredients under "To roast and grind" section until the urad dal turns light brown.
  4. Allow it to cool down and grind it to a coarse powder.
  5. Heat oil in a pan, add mustard seeds. When it splutters, add garlic, onion and curry leaves. Sauté till onion turns translucent.
  6. Add the potatoes, adjust the salt if needed and sauté for 5-6 minutes until the potatoes are crispy.
  7. Finally, add the ground spice powder to the potatoes and mix well so that the potatoes are coated with spice powder.
  8. Fry until it is golden brown and switch of the stove.


Note:

  1. Do not over cook the potatoes. Otherwise it will get mashed.
  2. If you want nice color to potato fry, use byadige red chili.


Sunday, May 10, 2020

Carrot Radish Paratha


 Hello everyone,

Parathas are traditional Punjabi cuisine. Mostly parathas are prepared for breakfast and people used to eat with pickle and curd/yogurt.
I always love stuffed parathas. I tasted radish/mooli paratha in Bobby Da Dabha near Ulsoor, Bangalore for the first time. The parathas they serve are delicious.
I usually make sambhar or paratha using radish. When I thought of making radish paratha, I found I had only one which is not sufficient to make parathas for 3 people. That’s when I thought it will taste better if I add carrot.
This Carrot Radish paratha is prepared with grated carrot and radish  and some spices.
Carrot and Radish mix is stuffed in the parathas which gives unique flavor and taste.


Ingredients
For the stuffing:
Grated Carrot-1 Cup
Grated Radish-1Cup
Turmeric powder-1/4 tsp
Chili powder- 1/2tsp
Cumin powder-1/2 tsp
Amchur powder-1/4 tsp
Ajwain/carom seeds-1/4 tsp
Coriander leaves- few finely chopped
Salt- as per taste

For the dough:
Wheat flour/Atta - 1.5 Cups + 1/4 Cup for dusting
Salt- as needed
Water- as needed
Oil- 1tsp

For Roasting:
Oil/Ghee - as needed

Method:
Procedure to make dough:
  1. In a large mixing bowl, take wheat flour, salt. Add water little by little to make a soft pliable dough. Then add oil so that the dough will not be sticky.
  2. Kneed the dough for 5mins.
  3. Cover it with moist cloth and let it rest for 30mins.


Procedure to make stuffing:
While the dough is resting, lets make the stuffing.
  1. Squeeze the water completely from grated radish. Keep the extracted radish juice to add in dough.
  2. Transfer the radish to a mixing bowl. In the same bowl, add grated carrot and all other ingredients in the 'For the Stuffing' section.
3.Mix well so that all the ingredients are blended with carrot and radish. Now the stuffing is ready.

Assembling and roasting parathas:
  1. Take a medium ball sized dough ,roll and flatten it to a circular shape. (Do not make it too thin as we make chapati)
  2. Place the carrot radish stuffing in the center.
  3. Close the stuffing by pinching the edges towards the center.
  4. Sprinkle some wheat flour and roll it to a think paratha.
  5. Heat tawa by drizzling some oil/ghee. Once the tawa is hot, place the paratha.
  6. Cook the paratha on both the sides by applying some oil/ghee on it. Press it gently.
  7. Carrot Radish paratha is ready to serve with curd and pickle of your choice.